Clothes can occasionally develop holes in them. Don’t discard them just yet, though. Even without sewing experience, you can still preserve your most beloved ensembles. In fact, since this method reduces the possibility of conspicuous, knobby stitches, you might wish to use it even if you are able to sew for little holes. You may be surprised to learn that more clothes than you would have once you start looking for these bothersome holes. Luckily, fixing each pinprick will only take a few minutes once you get the hang of it.
What Leads to a Clothing Hole
There are numerous reasons why these bothersome little holes could form. It’s simple to point the finger at moths, but they’re not the only ones. Pinpricks can result from normal wear and tear as well as snagging from everyday objects and accessories. These may consist of:
Pull-ons Bras Belts
Your laundry sink
Spots of chlorine bleach on uneven surfaces
Ways to Avoid Holes
The offender may be revealed by the holes’ position. Belt buckles, for example, can cause holes in shirts by rubbing or catching the fabric. If so, omit the belt, adjust it frequently, or use sandpaper to soften the jagged edges. The zipper may be to blame for holes if you tuck your shirts inside your jeans. However, cleaning clothes in the washing machine can also harm zippers. Consequently, before washing pants, sweatshirts, and similar items, zip them up to avoid them snagging on other things. Likewise, fasten bras before washing them to prevent the metal fasteners from catching on other articles of clothing. As an alternative, store the bras apart in a laundry bag, particularly if they have a tendency to come loose.
Speaking of washing machines, there are additional undesirable practices that might lead to a hole in clothing. For example, don’t overburden the machine; this increases the likelihood of snags on things with buttons, zippers, and other details. Thus, avoid overloading the washing machine and make sure to flip clothes that have buttons, beads, or other embellishments inside out.
Additionally, keep delicate fabrics like silk and cotton apart from durable items like towels and linens. Rather, ensure that low spin cycles are used for silk and other fragile items. Additionally, use caution when using chlorine bleach because excessive or improper use can cause holes in garments. Therefore, use caution or use ecologically friendly products like baking soda, vinegar, or citric acid.
In addition to being a frequent cause of holes, moths also eat and steal from other fabrics, particularly in textiles derived from animals like wool, silk, and leather. Therefore, to combat male moths, employ pheromone traps; to repel the remaining moths, use essential oils of mint or lavender, or store dried lavender in mesh bags. If the infestation is severe, use vinegar to clear the closet and warm water to wash your items.
Finally, pay attention to rough surfaces like stone, wood, exposed nails, and brick. Snags could result from rubbing or bumping against them. These holes could go unnoticed at first, but with washing or additional wear and tear, they might unravel and get worse. Therefore, to prevent unintentional tearing, think about flattening or covering any such surfaces you have around your home.
Ways to Mend Clothes Without Stitching
The following items are necessary before you begin patching any holes:
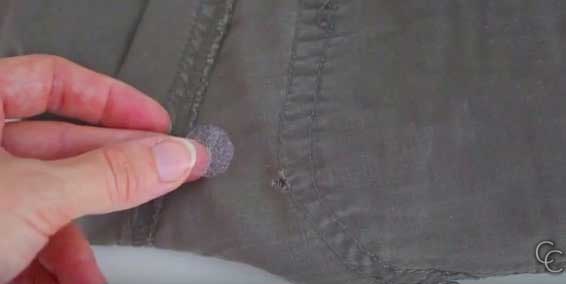
Items of clothing with holes 5 mm or smaller
One Iron
Web of fusible bonds
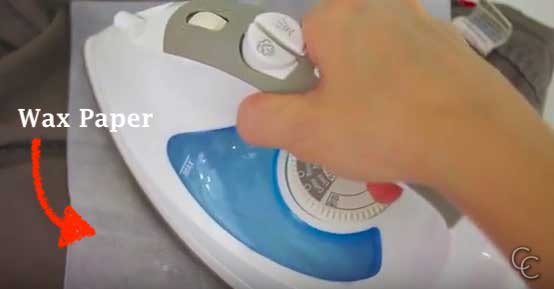
A big wax paper piece
Instructions:
1. With the hole facing out, turn the damaged item of clothing inside out and set it on the ironing board.
2. Trim a tiny piece of fused web. It ought to be marginally larger than the hole that has to be fixed.
3. Cover the hole with the fusing web after gently pressing the two sides of the hole together to make it appear as though the hole has disappeared. Cover the same area with the wax paper. Fusing web is available on Amazon, Walmart, and fabric and craft stores.
4. After that, lay your iron on the “wool” setting and press it against the wax paper. For roughly ten seconds, do not move the iron or apply pressure to it. Remove with caution.
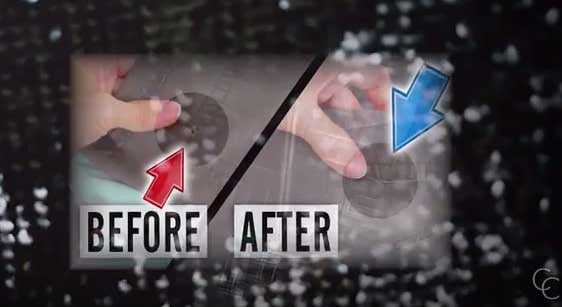
5. TO FINALLY CHECK THE HOLE, PICK UP THE PIECE OF CLOTHING AND TURN IT RIGHT-SIDE-IN. USE YOUR FINGERS TO CLOSE THE HOLE LIKE IN STEP TWO IF IT HAD NOT CLOSED SMOOTHLY. USE THE IRON IN STEPS THREE AND FOUR AGAIN UNTIL THE CLOTHING SEEMS LIKE NEW. AFTER MAKING A FEW ATTRYPES TO MASTER THE METHOD, YOU WILL IMMEDIATELY NOTICE THAT THE HOLE LOOKS GONE.